
How to Map Your Fire Pit Table Footprint Before Purchase
The most common frustration we encounter in the outdoor furniture industry isn't a product defect; it is the "it looked smaller online" realization. Industry data from retail practitioners indicates that over 60% of fire pit and table returns are driven by size and fit issues. This often happens because a customer measures the floor space but underestimates the psychological and physical presence a fire feature commands once it is lit.
When you add a fire table to a small patio or balcony, you aren't just adding a piece of furniture. You are adding a heat source, a light column, and a new focal point for foot traffic. This guide provides a methodical, safety-first approach to mapping your footprint before you click "buy," ensuring your outdoor space remains both comfortable and compliant with safety standards.
The Foundation of Fire Safety and Clearance
Before you pick up a measuring tape, you must establish your safety boundaries. Fire safety is not a suggestion; it is a requirement for protecting your home and meeting local regulations.
According to the U.S. Fire Administration (USFA), a fundamental rule for outdoor fire safety is the "10-foot rule." You should maintain a minimum of 10 feet of clearance between any fire feature and structures, including your house, overhanging eaves, or wooden fences. While propane fire tables are generally more controlled than wood-burning pits, this distance remains a critical benchmark for preventing heat damage and accidental ignition.
For those living in apartments or condos with balconies, the rules are often stricter. We recommend checking for local amendments to the International Fire Code (IFC). Many municipalities have specific restrictions regarding the use of "open-flame" devices on combustible decking materials. Even if your HOA allows it, your local fire marshal may require a non-combustible barrier or specific clearances that exceed the manufacturer's manual.
Logic Summary: Our safety recommendations are grounded in the Home Fires Safety Guidelines from Ready.gov, which emphasize prevention through distance and supervision. We assume a standard residential setting where structural integrity and occupant egress are the primary concerns.
Accounting for the "Comfort Zone" Heuristic
A frequent mistake is measuring the physical dimensions of a product—such as the 32 Inch Propane Fire Pit Table, Brown—and assuming that is the only space you need. In practice, you must account for the "comfort zone."
Through years of observing customer setups, we have developed a proven heuristic: add a minimum 18-inch comfort zone beyond the manufacturer’s safety clearance.
This 18-inch buffer serves two purposes:
- Leg Room and Heat Management: Guests need space to stretch their legs without being too close to the heat source.
- Traffic Flow: You need enough space to walk behind seated guests without tripping over the edge of a balcony or bumping into the table.
Footprint Calculation Model
To help you visualize this, we have modeled the total "active footprint" for a standard square fire table.
| Parameter | Value | Unit | Rationale |
|---|---|---|---|
| Table Width | 32 | Inches | Product Dimension |
| Seating Depth | 24 | Inches | Standard Outdoor Chair |
| Knee/Heat Buffer | 18 | Inches | Recommended "Comfort Zone" |
| Total Linear Span | 116 | Inches | Table + (2x Seating) + (2x Buffer) |
Note: This is a scenario model for a standard seating arrangement; individual spatial needs may vary based on chair style and user height.

The Cardboard Mockup Method: A Practical Test
To eliminate purchase anxiety, we suggest a physical mockup. This is the most effective way to "feel" the scale of the product in your specific environment.
- Gather Your Materials: Find a large cardboard box.
- Cut the Template: Cut the cardboard to the exact footprint of the table you are considering. For example, if you are looking at the 42 Inch Propane Fire Pit Table, Black, cut a square that is 42 inches by 42 inches.
- The Weighted Box Test: For upper-level balconies, we recommend using a weighted box to simulate the product's heft. Many fire tables, like the 42 inch Rectangular Propane Fire Pit Table, Black, can weigh upwards of 70 lbs. Placing a weighted template reveals if your floor feels stable and if the weight distribution is appropriate for your deck's joists.
- Simulate Traffic: Place your outdoor chairs around the template. Attempt to walk around them. If you find yourself "shuffling" or turning sideways to pass, the unit may be too large for your current layout.
Selecting the Right Shape for Your Space
The shape of the table is just as important as the total square footage. In small spaces, geometry dictates flow.
Square Tables
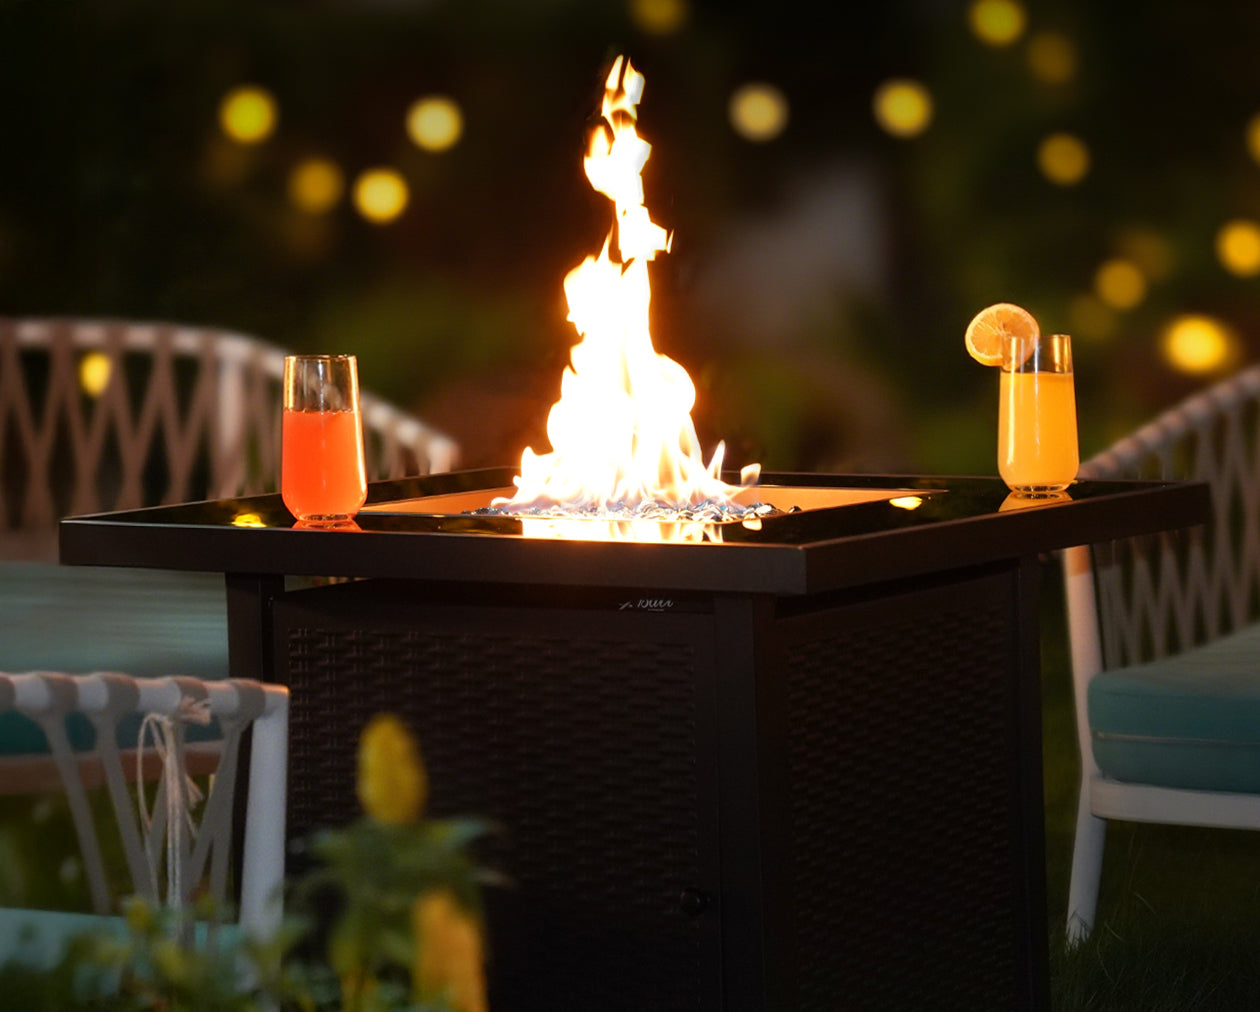
Square tables, like the 32 Inch Propane Fire Pit Table, Brown, are ideal for symmetrical patios. They create a "campfire" feel where everyone is equidistant from the flame. This model is particularly effective because of its 2-in-1 design; with the lid on, it functions as a full coffee table, maximizing the utility of a limited footprint.
Rectangular Tables
If you have a narrow balcony or a long, thin deck, a rectangular footprint is typically more efficient. The 42 inch Rectangular Propane Fire Pit Table, Black allows for a wider "social lane" while keeping the profile slim. This prevents the fire feature from completely blocking the path from your door to the edge of the railing.
Vertical Solutions
If your mockup reveals that even a 32-inch table is too intrusive, consider a vertical heat source. The 32 Inch Propane Patio Heater, Black offers a much smaller footprint (approximately 32 inches at the reflector cap but much narrower at the base). This provides 40,000 BTUs of warmth without requiring a central floor "island," making it a high-performance choice for the tightest urban balconies.
32 Inch Propane Fire Pit Table, Brown with glass tabletop reflecting flames.
Managing the Heat and Light Column
When you map your space, look up. A fire table creates a "column" of heat and light that extends vertically.
According to the Centers for Disease Control and Prevention (CDC), propane-burning appliances must be used in well-ventilated outdoor areas to prevent the buildup of Carbon Monoxide (CO). Never use a fire table inside a screened-in porch or under a low-hanging canopy that restricts airflow.
Furthermore, the National Park Service guidelines on fire maintenance remind us that heat rises rapidly. If you have low-hanging trees or a plastic balcony ceiling, you must ensure there is enough vertical clearance to prevent melting or scorching. A general rule of thumb is to maintain at least 72 to 84 inches of overhead clearance, though you should always defer to the specific height requirements in your product manual.
Final Layout Verification
Before you finalize your decision, perform one last check of your "Active Flow" zones.
- The Door Swing: Ensure that your patio or balcony door can open fully without hitting a chair or the fire table.
- The Gas Line Path: If you are using a propane tank hidden inside the table (like our 50,000 BTU models), ensure you have easy access to the side panel for tank exchanges.
- The "Exit" Strategy: In the event of an emergency, can you quickly and safely move away from the fire feature? There should be at least one clear path to the door that does not require squeezing past the heat source.
By taking the time to mock up your space with physical templates and adhering to the 10-foot safety rule, you can transform a small outdoor area into a confident, comfortable retreat. Mapping the footprint isn't just about making sure the table fits; it’s about making sure you can actually enjoy it once it arrives.
Disclaimer: This article is for informational purposes only and does not constitute professional safety, legal, or fire prevention advice. Always consult your local fire department, HOA regulations, and the specific manufacturer’s instruction manual before installing or operating a fire feature. Ensure all gas connections are tested for leaks according to the provided safety guidelines.

